Miro
The Autohive Miro integration connects your Miro workspace with Autohive’s automation platform, enabling:
- Board management - Create new boards and search boards accessible to you
- Context and search - Explore high-level board items and summarize board or item content
- Diagram generation - Create and update Mermaid diagrams directly on a board
- Structured content - Create and edit documents and tables on a board
- Image handling - Upload, read, and download images on a board
- Collaboration - Read comments left on a board or its items
Install the integration
Miro uses OAuth 2.1 to connect your workspace.
Log in to Autohive and navigate to Your user profile > Connections or Your workspace -> Manage workspace
Locate the Miro Integration card and click Connect
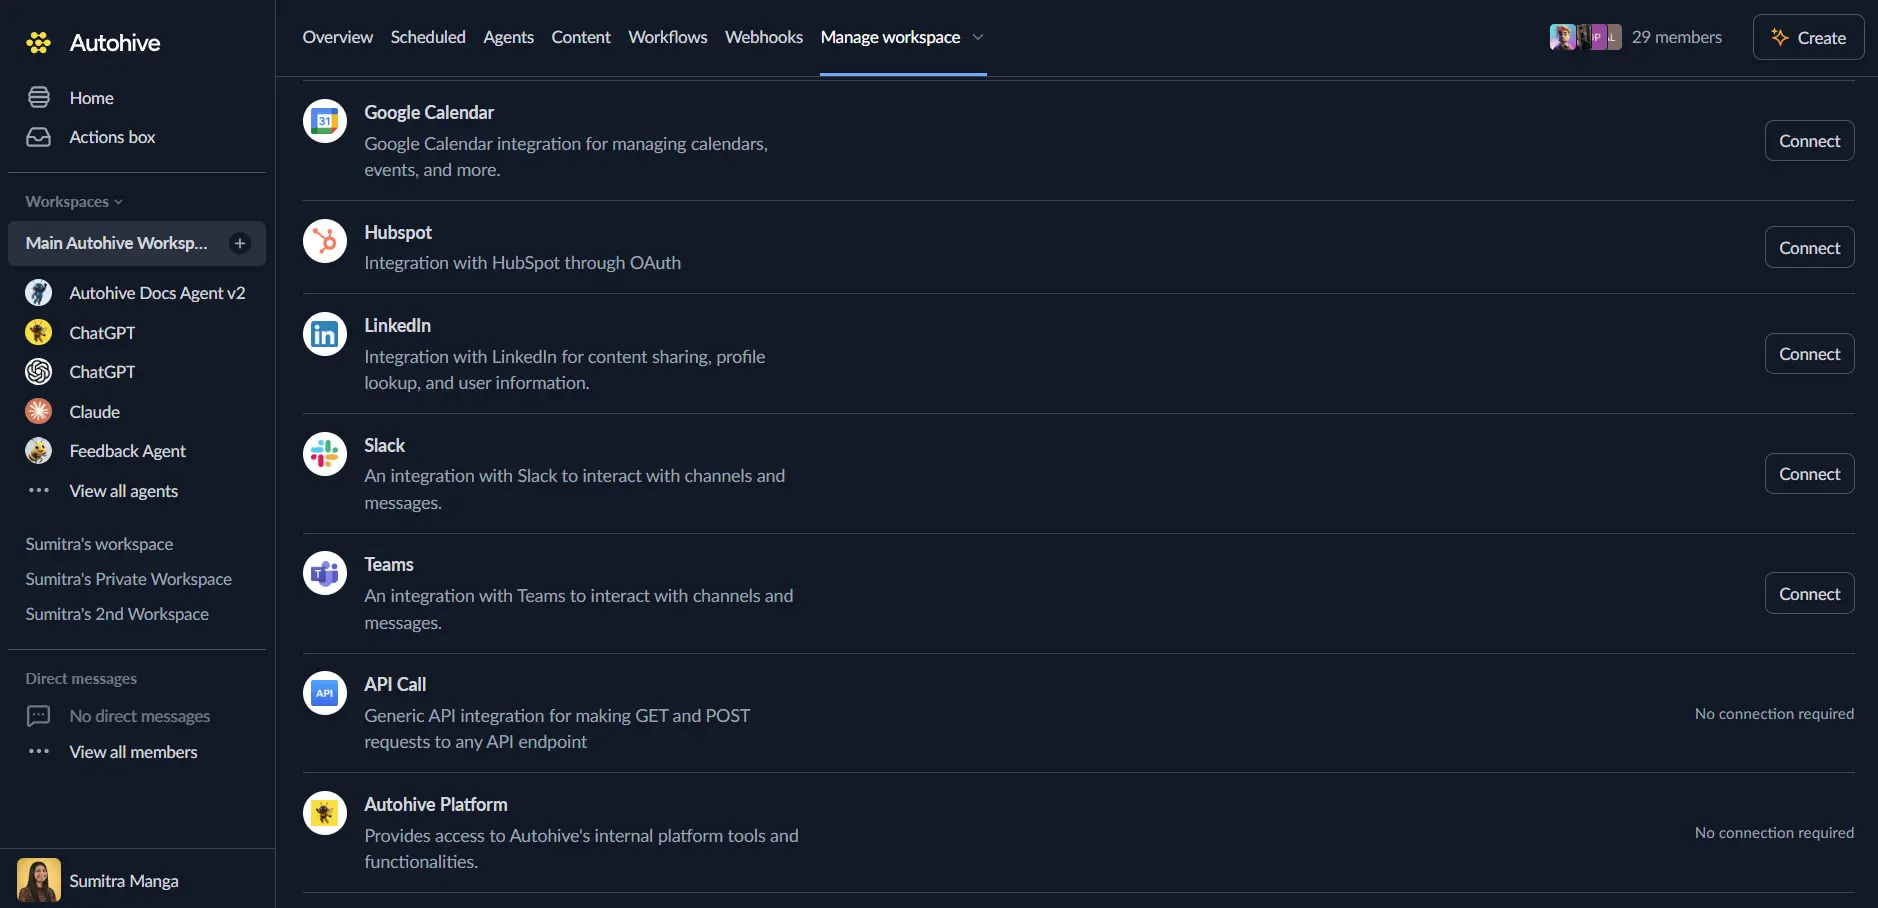
Authorize with Miro - you’ll be redirected to Miro’s authorization page
Select the team where the boards you want to work with live, and approve the requested permissions
Confirm installation - you’ll be redirected to Autohive with “Connected” status displayed
Use the integration
You can now use the integration with your agents, workflows and scheduled tasks!
- Follow our Create your first agent guide on how to create an agent.
- In the ‘Agent settings’, scroll down to the ‘Add capabilities’ section and turn on the Miro capability. You can choose what individual Miro capabilities to turn on and off.
- Once the settings have been selected, begin prompting the agent of the workflow you’d like to achieve with Autohive and Miro!
Available capabilities
Boards
- Create New Board: Create a new Miro board
- Search Boards: Search and list boards accessible to the current user
- Read Board Items: List items on a board with cursor-based pagination, with optional filtering by item type or parent container
Context and search
- Find Formats: Explore high-level items on a board, such as frames, documents, prototypes, tables, and diagrams
- Summarize Board: Get text context from a board or a specific item on a board (uses AI credits)
Diagrams
- Create Mermaid Diagram: Create a Mermaid diagram on a board
- Update Mermaid Diagram: Update an existing Mermaid diagram on a board
- Diagram Layout: Get the DSL format specification for creating diagrams
Documents and tables
- Create Document: Create a structured document item on a board
- Read Documents: Read the content of a document item from a board
- Update Document: Edit content in an existing document item using find-and-replace
- Create Table: Create a table on a board with specified columns
Images
- Image Metadata: Get image metadata and base64-encoded image data for an image item
- Get Upload URL: Get a temporary, single-use presigned POST URL for uploading an image
- Download Image: Get a download URL for an image item
Code and comments
- Create Code Widget: Create a code widget on a board
- Read Comments: List comments from a board or a specific item on the board
Key features
Board summarization and search
Summarize the content of a board or a specific item, and explore high-level formats like frames, prototypes, and tables without manually opening the board.
Diagram generation from text
Generate architecture, sequence, or other Mermaid diagrams directly on a board from a text or code description, and update them as requirements change.
Structured content creation
Build documents and tables on a board programmatically, and attach images by uploading or linking to public URLs.
Common use cases
Meeting and workshop follow-up
- Summarize a workshop board’s stickies and frames into a written recap
- Turn discussion captured in comments into a structured list of next steps
Documentation and diagramming
- Generate an architecture or sequence diagram on a board from a code snippet or description
- Keep a diagram in sync by updating it as the underlying design changes
Research and knowledge capture
- Create structured documents or tables on a board to organize findings
- Pull board content into an agent workflow for summarization or reporting
Disconnect the integration
- Navigate to Your user profile -> Connections or Your workspace -> Manage workspace
- Find the Miro Integration
- Click Disconnect and confirm
Data Impact: Existing boards and content remain unchanged in Miro. Disconnecting only removes Autohive’s API access.