Workspaces
Workspaces are how you organise work within your plan. Each workspace has its own agents, conversations, content, scheduled jobs, and members. A plan can have as many workspaces as you need — one per team, project, client, or however you prefer to organise things.
Your workspaces are listed in the left sidebar. Click any workspace name to open it.
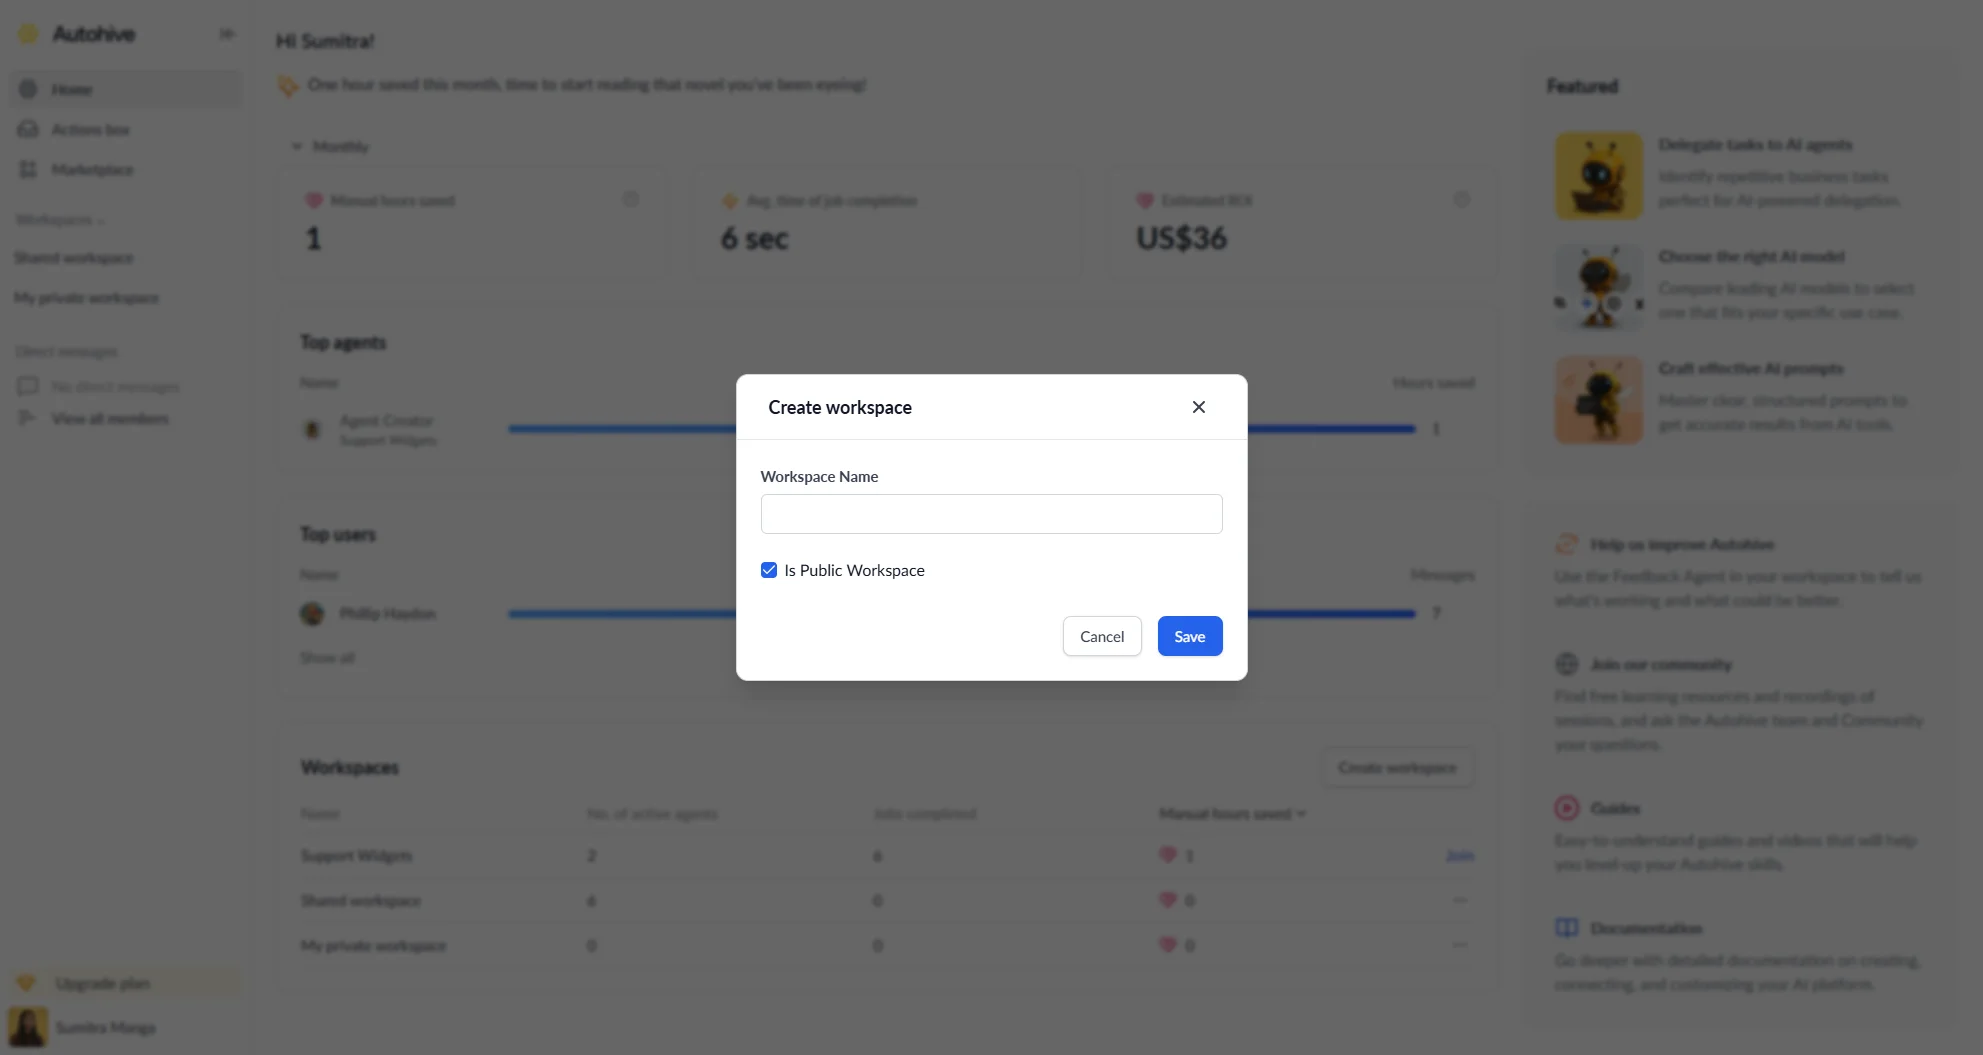
Workspace types
When you create a workspace you choose its visibility:
| Type | Who can access it |
|---|---|
| Public | Any member of your plan can join and use it |
| Private | Only members who have been explicitly added or invited |
| Personal | Only you — automatically created for every account |
You cannot leave or delete your personal workspace.
Creating a workspace
- Click Workspaces in the left sidebar to open the workspaces menu.
- Select Create workspace.
- Enter a Workspace name (up to 100 characters).
- Check Is Public Workspace if you want any plan member to be able to join.
- Click Save.
The new workspace opens immediately and is added to your sidebar.
Viewing all workspaces
Select View workspaces from the Workspaces menu to see every workspace on your plan. The list shows all public workspaces and any private workspaces you belong to. Plan owners also see private workspaces they haven’t joined, but they must be added to a private workspace before they can open it.
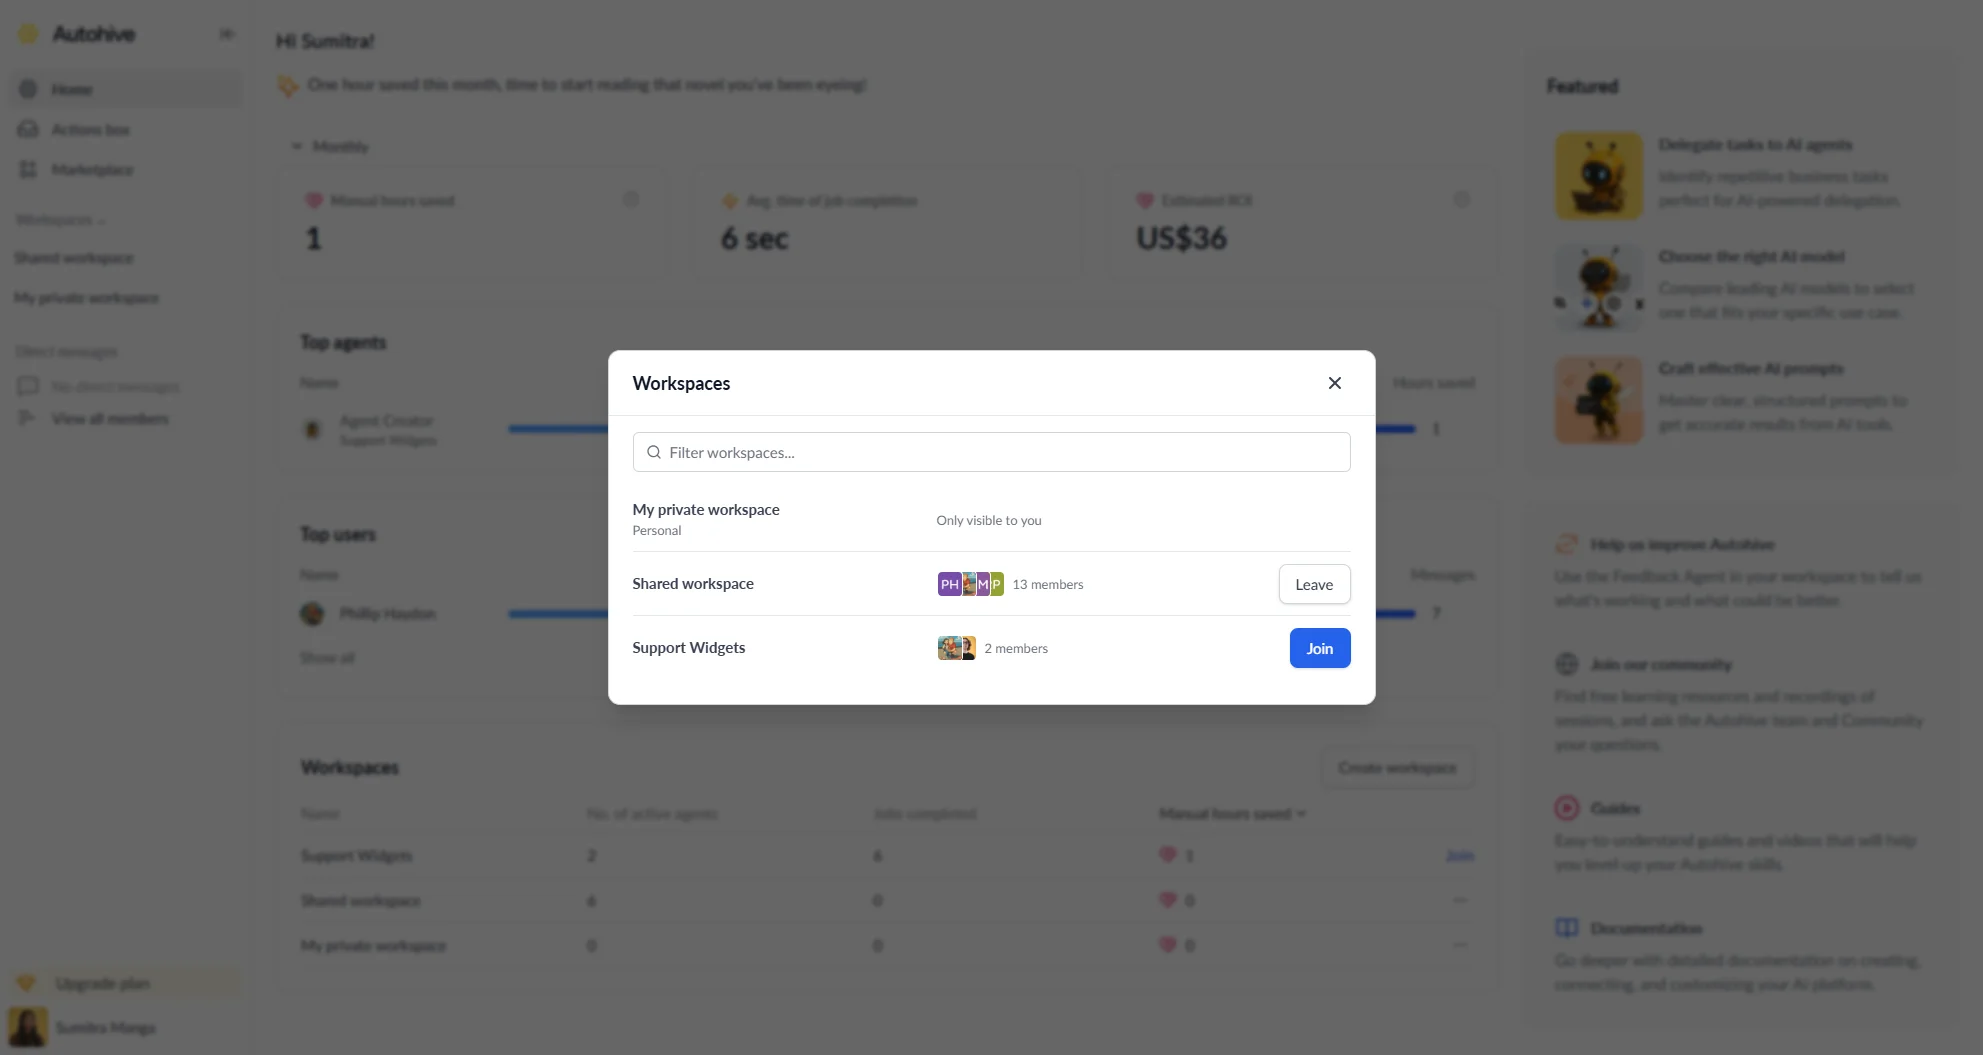
Each workspace shows its type, member count, and member avatars. From here you can:
- Join a public workspace you haven’t joined yet
- Leave a workspace you no longer need access to
Use the Filter workspaces field to search by name.
Workspace overview
When you enter a workspace, the Overview tab is your starting point. It shows your top performing agents and upcoming scheduled jobs at a glance.
Workspace settings
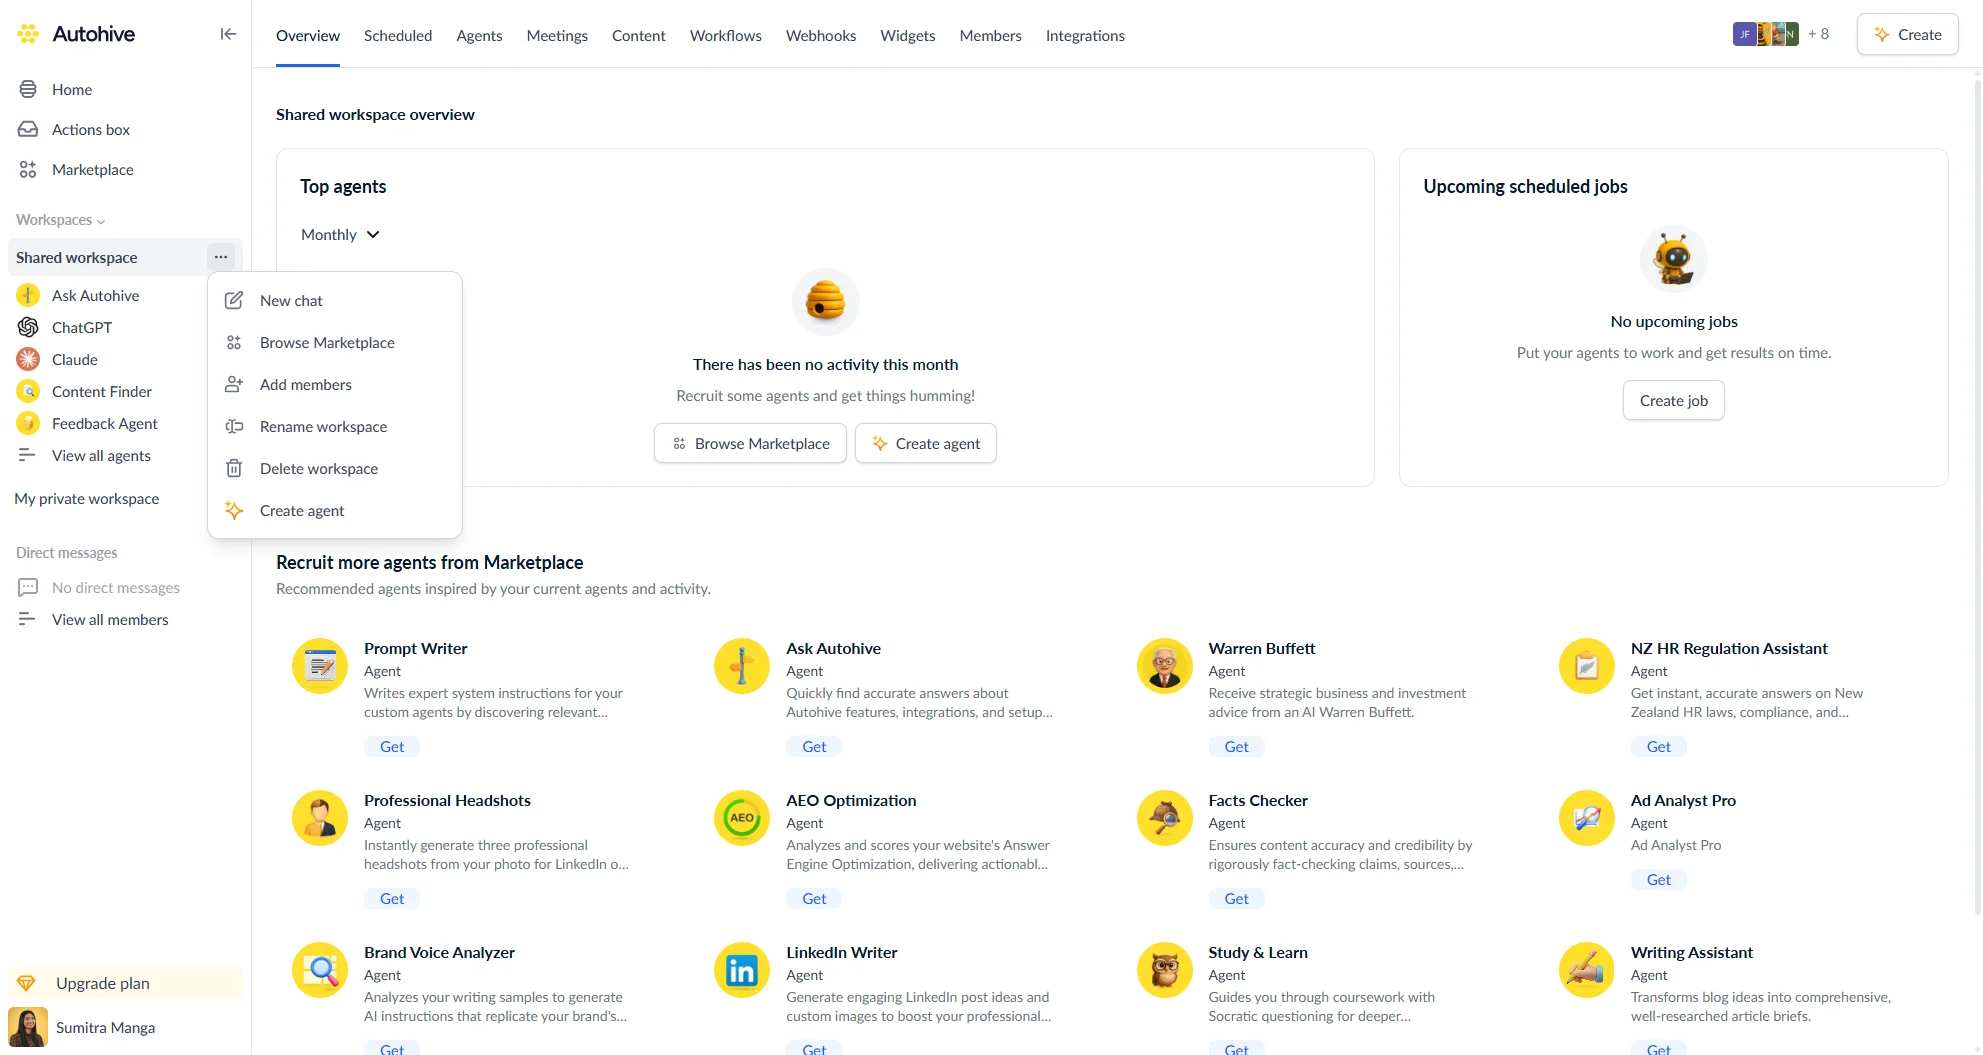
Renaming a workspace
Open the three-dot menu on the workspace in the sidebar and select Rename workspace. Enter the new name and click Save changes.
Workspace actions menu
Click the three-dot menu on any workspace in the sidebar to quickly:
| Action | Description |
|---|---|
| New chat | Start a new conversation in the workspace |
| Browse Marketplace | Browse agents to add to this workspace |
| Add members | Invite plan members to this workspace |
| Rename workspace | Change the workspace name |
| Create agent | Build a new custom agent in this workspace |
Leaving a workspace
Open View workspaces from the Workspaces menu, find the workspace, and click Leave. Confirm when prompted.
You cannot leave your personal workspace.
Deleting a workspace
- Open the workspace you want to delete.
- In the left sidebar, click the workspace name to open the Workspaces menu, then click the settings icon (Manage) next to the current workspace.
- Click Delete workspace and confirm when prompted.
Who can delete a workspace
| Who | Can delete |
|---|---|
| Members of the workspace | Yes |
| Managers | Only workspaces they are a member of, the same as other members |
| Plan members who have not joined the workspace | No, even if the workspace is public |
You cannot delete your personal workspace or your plan’s default workspace. To delete the default workspace, a plan owner must first choose a different default workspace in plan settings.
Managing workspace members
For full details on adding and removing members, see the Workspace members guide.