Workflows
Workflows let you build visual automations that connect your agents, tools, and integrations into a sequence of steps that run deterministically. From simple scheduled tasks to multi-step processes with approvals, workflows handle complexity so you don’t have to.
Access Workflows from your workspace home page, click the Workflows tab in your workspace header.
Creating a workflow
Each workflow starts with a trigger — the event that kicks everything off — followed by a series of steps that run in order.
- Click Create workflow.
- Click Add trigger to choose how the workflow starts.
- Click the blue plus button sticking out from the right edge of the node to add in a action, agent, or logic step.
- Click Save when done. you’ll be asked to name your workflow.
The workflow will run depending on the trigger that was added at the start of your workflow.
New workflows are named “New workflow” by default. Click the name in the header to rename it.
Triggers
A trigger defines what starts the workflow. Every workflow must have at least one trigger to start off. Multiple triggers can be added to a single node, or different nodes along the same workflow. Or a workflow could contain multiple entirely separated workflows, each with one or more triggers.
Manual trigger
If the workflow contains any Click to start triggers, you can select those nodes, causing the node configuration panel to open. Here you can click the Run workflow button to execute the workflow from that starting point.
Webhook trigger
Starts the workflow when an external service sends an HTTP POST request to a unique webhook URL. When you add a webhook trigger, you define the expected properties of the incoming payload (field name and type). Save the workflow to generate the URL, then configure your external service to POST to it.
Scheduled trigger
Runs the workflow automatically on a recurring schedule. Available frequency options:
| Option | Description |
|---|---|
| Once | Runs one time at a specified date and time |
| Daily | Runs every day at the same time |
| Weekly | Runs every week on a specific day |
| Every weekday | Runs Monday through Friday |
| Every two weeks | Runs every other week on a specific day |
| Custom | Set your own interval (e.g. every 3 days, first Monday of each month) |
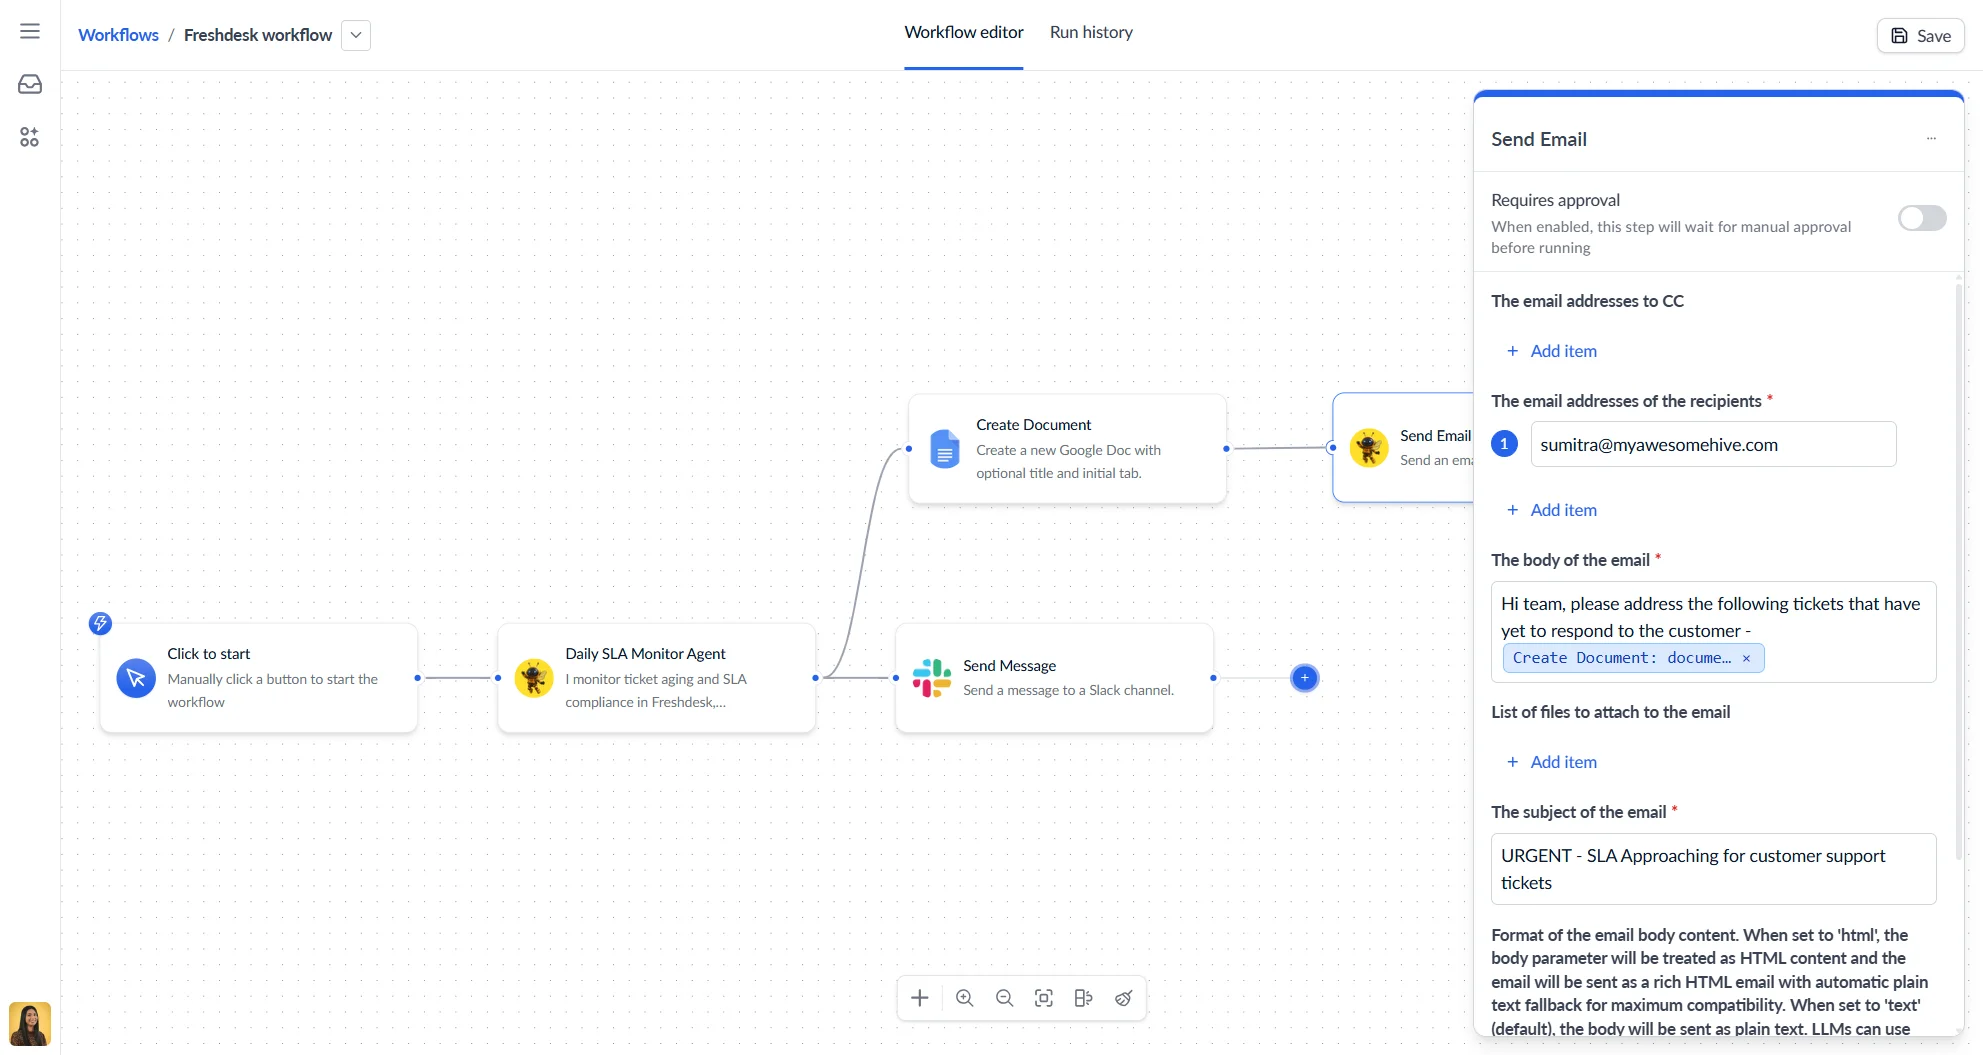
Adding nodes
Nodes are the individual steps in your workflow. Click the + (Add Step) button at the bottom center of the canvas to open the step library. Search or browse by category, then click or drag a node onto the canvas.
| Category | Purpose | Examples |
|---|---|---|
| Triggers | Start the workflow | Manual, Webhook, Scheduled |
| Actions | Perform tasks using integrations | Send email, create a calendar event, update a CRM record |
| AI agents | Run an agent with a prompt | Analyse data, generate content, extract information |
| Flow | Control the execution path | Iterator (loop over a list), Spreadsheet reader |
Configuring nodes
Click any node to open its configuration panel. From here you can:
- Rename the node for clarity
- Fill in required fields (marked with *)
- If any input to a node is to be provided by the output of a prior node, then you can type “#” in the text box to substitute values from previous steps. Most input controls that don’t use a text box will provide a drop down selector instead where you can pick outputs from prior nodes.
- Enable Requires approval if the step needs a team member to sign off before it runs
Canvas controls
The workflow canvas is where you build and connect your nodes.
Below is a set of buttons that can be found at the bottom of each canvas.
| Control | What it does |
|---|---|
| Zoom in / Zoom out | Adjust the canvas zoom level |
| Zoom to fit | Centre and fit all nodes in view |
| Snap to grid | Align nodes to a grid for clean layouts |
| Tidy up | Auto-arrange node positions |
Running a workflow
Running manually
Open the workflow in the editor and click Click to start. The Click to start button can be found in the configuration panel of a node.
While running:
- Nodes show their current state with visual indicators (processing, completed, failed, pending approval)
- Click any completed node to see its outputs, execution time, and status
- Click Stop to cancel the run, found at the top of the screen
- Click Back to editor to exit execution mode, found at the top of the screen
When a node pauses for approval, you can edit its inputs before allowing it to continue.
Execution statuses
| Status | What it means |
|---|---|
| Running | The workflow is currently executing |
| Run complete | All steps finished successfully |
| Pending approval | A step is waiting for manual approval |
| Failed | A step encountered an error |
| Cancelled | The run was stopped manually |
Run history
Click the Run history tab in the workflow editor to see all past executions. Each run shows the time it started and its status. Click any run to view the execution detail — node-by-node results including outputs, and timing.
Approvals
Any non-trigger node can be configured to require manual approval before it executes. When a workflow reaches an approval step, it pauses and waits for a team member to approve or reject before continuing.
To enable approvals on a node, click the node and toggle Requires approval in the configuration panel.
Iterator
The Iterator node lets you loop over a list and run a set of steps for each item in that list.
Set the input of the iterator to either be a new list, or a list provided by a prior node.
- Bottom edge — nodes connected below the iterator form the branch that runs once for each item. Use the iterator’s value output within this branch to reference the current item and actually do something with it.
- Right edge — the connection leading out the right edge of the iterator allows the workflow to continue once the full loop has completed, for any steps that should run after iteration is done.
Spreadsheet reader
The Spreadsheet reader node reads a CSV or Excel file row by row, processing each row as an individual step in your workflow. Use it when you need to act on every record in a spreadsheet — for example, sending a personalised email for each row, or passing each row to an agent for analysis.
Inputs
| Input | Description |
|---|---|
| File | The CSV or Excel file to read. Can be selected from your Content area or passed in from a previous node. |
| Has header row | If enabled, the first row is treated as column headers and included alongside each data row in the output. |
Outputs
Each row produces two outputs you can reference in downstream nodes:
| Output | Description |
|---|---|
| line | The current row as a CSV-formatted string. If Has header row is on, the header row is included above the data row, separated by a newline. |
Connections
- Bottom edge — nodes connected below run once per row. Use the
lineoutput to work with each row’s data. - Right edge — nodes connected to the right run after the entire file has been processed, for any steps that should happen when iteration is complete.
Empty rows in the file are skipped automatically.
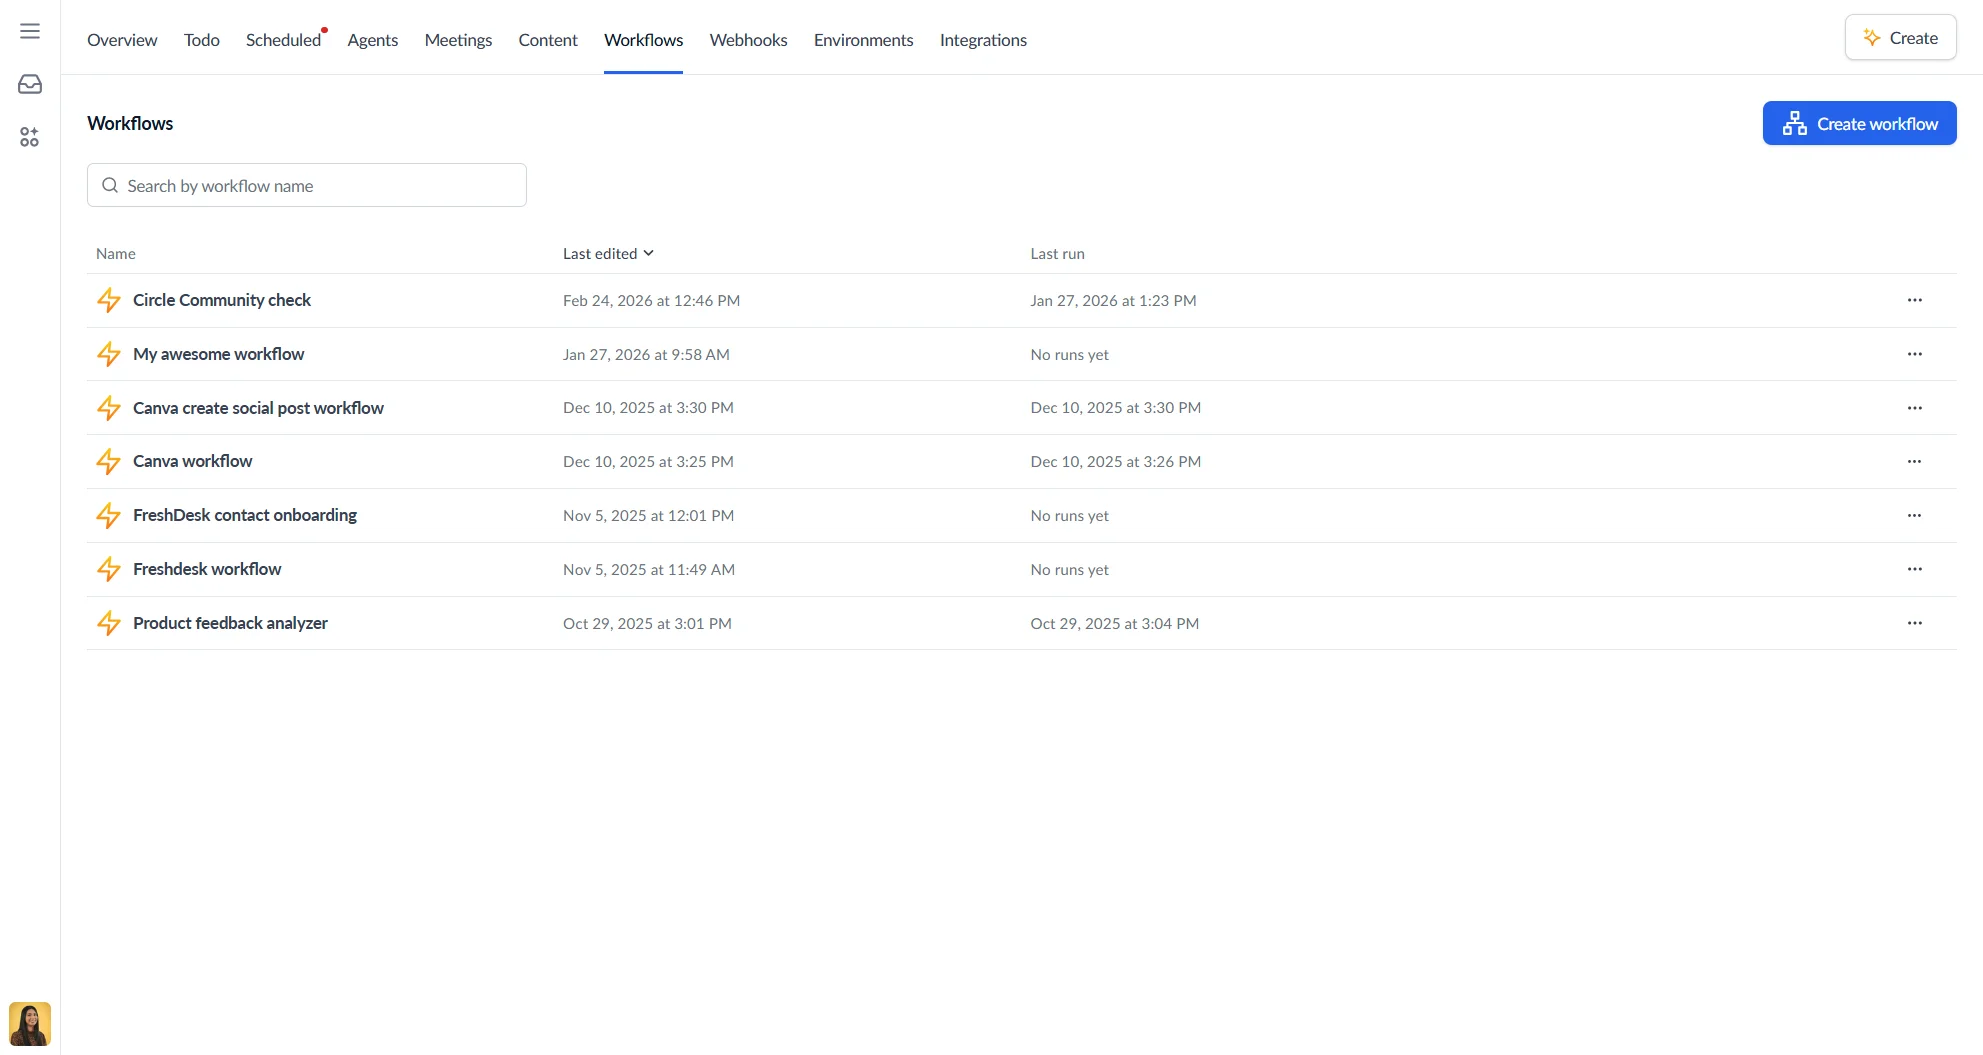
Managing workflows
The workflows list shows all workflows in your workspace with the following columns:
| Column | Description |
|---|---|
| Name | Workflow name and optional description |
| Last edited | When the workflow was last saved |
| Last run | When the workflow was last executed |
Renaming and deleting
Click the three-dot menu on any workflow in the list to Rename or Delete it. Deleting a workflow is permanent and cannot be undone.
Common issues
| Problem | Why it happens | How to fix |
|---|---|---|
| Workflow won’t save | Missing trigger or validation error | Check for error messages and ensure the trigger is configured |
| Step fails immediately | Missing credentials or invalid configuration | Click the node to see error details and verify the integration connection |
| No data flowing between steps | Incorrect token mapping | Review token selections and check that field names match |
| Webhook not triggering | External service misconfigured | Verify the webhook URL is correct and the payload format matches the defined properties |
| Schedule not firing | Workflow start date is in the past | Check review the schedule configuration |