Widgets
Widgets let you add an Autohive AI agent to your website as an embedded chat widget. Website visitors can ask questions, upload files if enabled, send screenshots if enabled, and continue a conversation without needing an Autohive account.
Each widget belongs to a workspace, is connected to one agent, and only works on the website domains you allow.
Before you start
Make sure you have:
- An Autohive workspace with Widgets enabled
- A workspace agent that is ready to answer website visitors
- Access to edit your website HTML or a CMS custom-code area
- The website domain where the widget should appear
For best results, configure the agent’s instructions, knowledge, and integrations before connecting it to a widget. See Agent settings for more detail.
Open Widgets
- Open the workspace that should own the widget.
- Click Widgets in the workspace header.
- Click Create Widget.
If the workspace does not show a Widgets tab, the feature may not be enabled for that workspace or plan.
Create a widget
When creating a widget, the form starts with three sections: General, Appearance, and Behavior. After the widget is created, Autohive shows the Installation section with the embed code. Existing widgets also show Installation while editing.
General
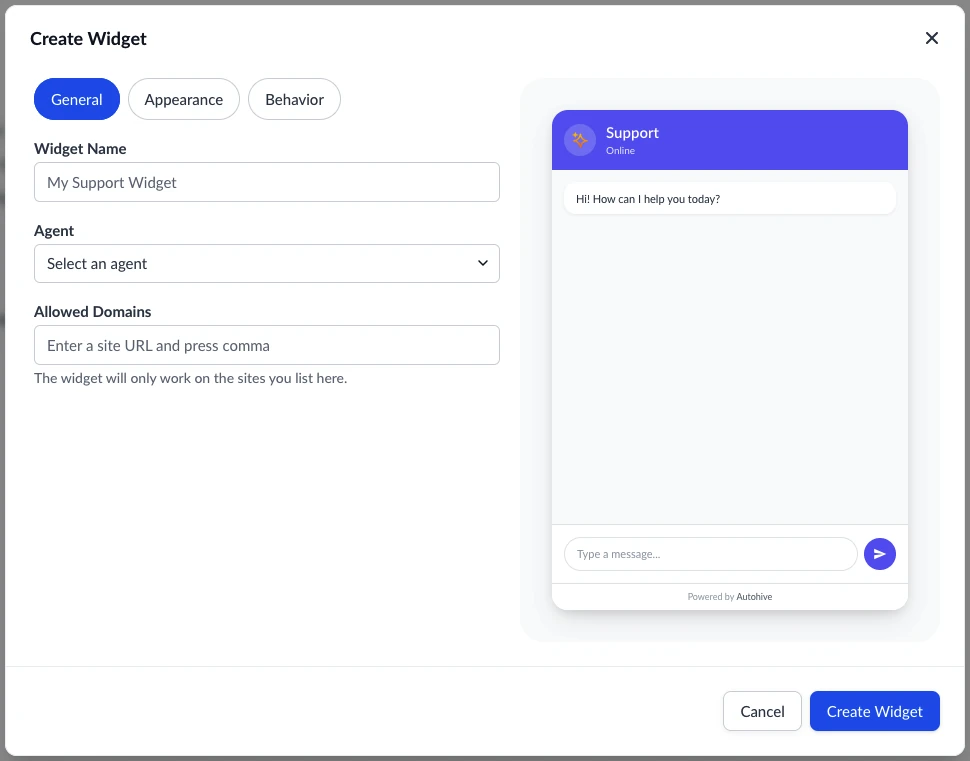
Use General to choose the agent and control where the widget is allowed to run.
| Field | Description |
|---|---|
| Widget Name | Internal name shown in Autohive. Visitors do not see this name. |
| Agent | The Autohive agent that answers visitor messages. |
| Allowed Domains | Website domains where the widget is allowed to start sessions and receive visitor messages. |
The installation script URL is public, but Autohive checks allowed domains before the widget can start a visitor session or send messages. Add each domain or subdomain that should use the widget.
Examples:
  example.com
www.example.com
help.example.com
Do not include paths like /pricing or /contact. If you need to test on a local website, add localhost as an allowed domain.
Appearance
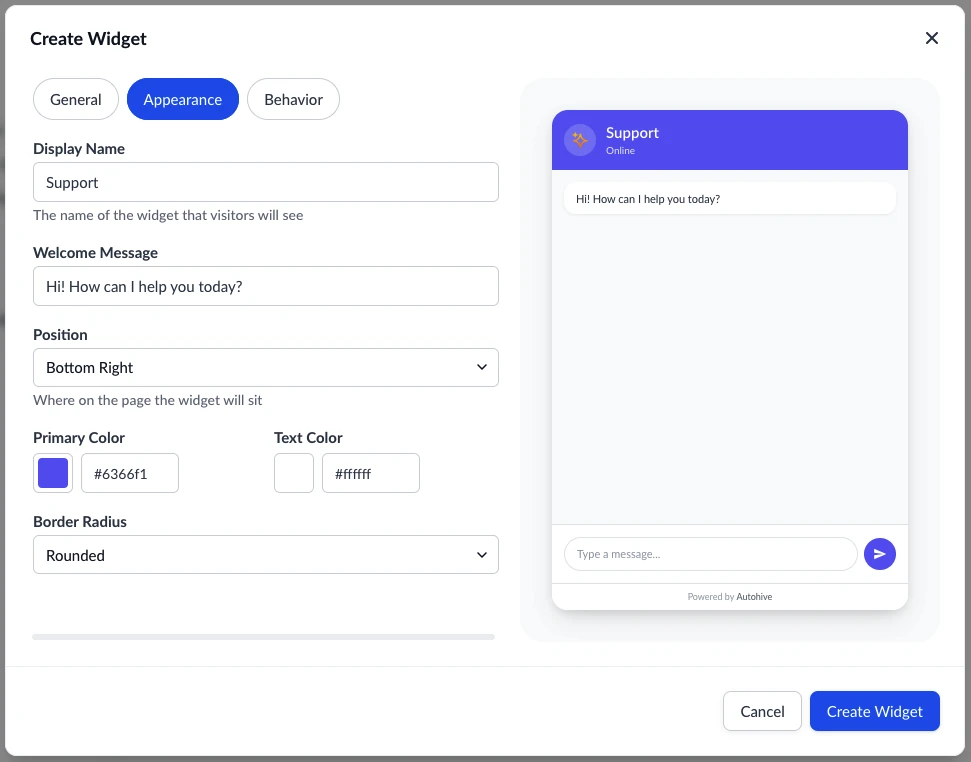
Use Appearance to control how the widget looks on your site.
| Setting | Description |
|---|---|
| Display Name | Name visitors see in the chat widget header. |
| Welcome Message | First message shown when the widget opens. |
| Position | Places the launcher at the bottom-right or bottom-left of the page. |
| Primary Color | Main widget colour, used for the launcher and primary UI. |
| Text Color | Text colour used on primary-colour areas. |
| Border Radius | Controls how rounded the widget UI appears. |
Use the preview panel while editing to check the widget style before saving.
Behavior
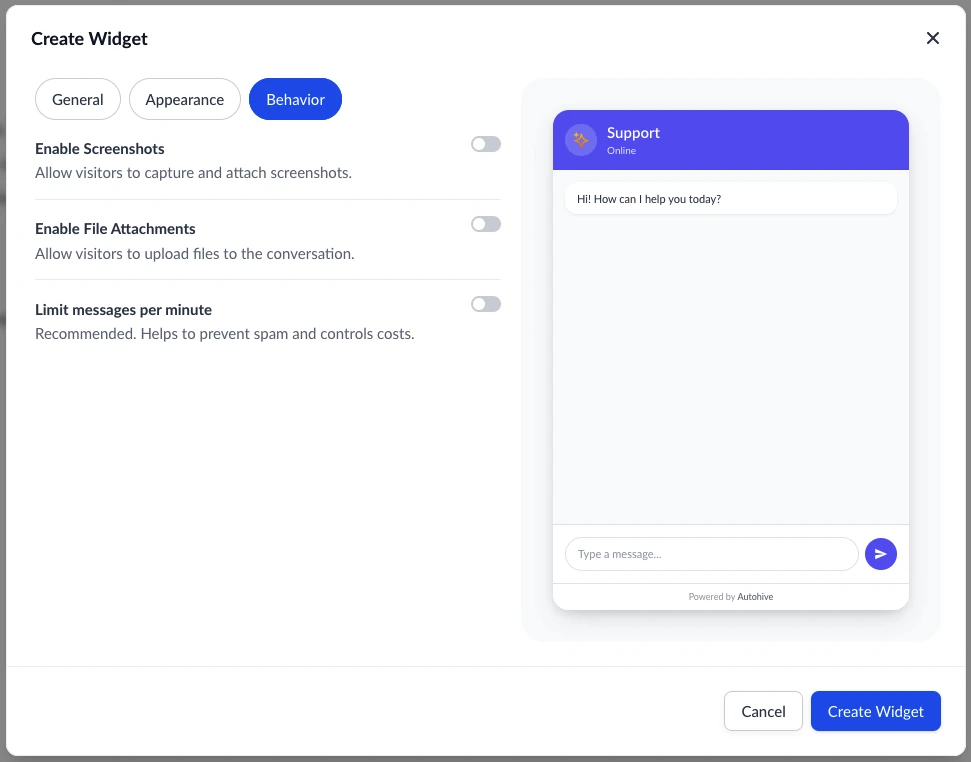
Use Behavior to control screenshots and uploads.
| Setting | Description |
|---|---|
| Enable Screenshots | Lets visitors capture and attach a screenshot to a message. |
| Enable File Attachments | Lets visitors upload files into the conversation. |
| Max file size | Sets the maximum upload size. Choose 1, 2, 3, 5, 10, 15, or 20 MB. |
| Max uploads | Sets the maximum number of uploads per conversation. Choose 5, 10, 15, 20, 25, or 50 uploads. |
| Allowed file types | Limits attachments to selected extensions. |
Supported attachment types are:
pdf, doc, docx, xls, xlsx, txt, csv, png, jpg, jpeg, gif, webp
Install the widget
After you create the widget, Autohive shows the installation code.
- Copy the code snippet.
- Paste it into your website HTML just before the closing
</body>tag. - Publish or deploy your website.
- Open the website and confirm the widget launcher appears.
The snippet looks like this:
<script src="https://app.autohive.com/widget/v1/{public-widget-id}/embed.js" async></script>
If your site uses a CMS like WordPress, Webflow, Squarespace, or Shopify, look for a Custom Code, Header/Footer Scripts, or Theme code area and place the snippet near the end of the page body.
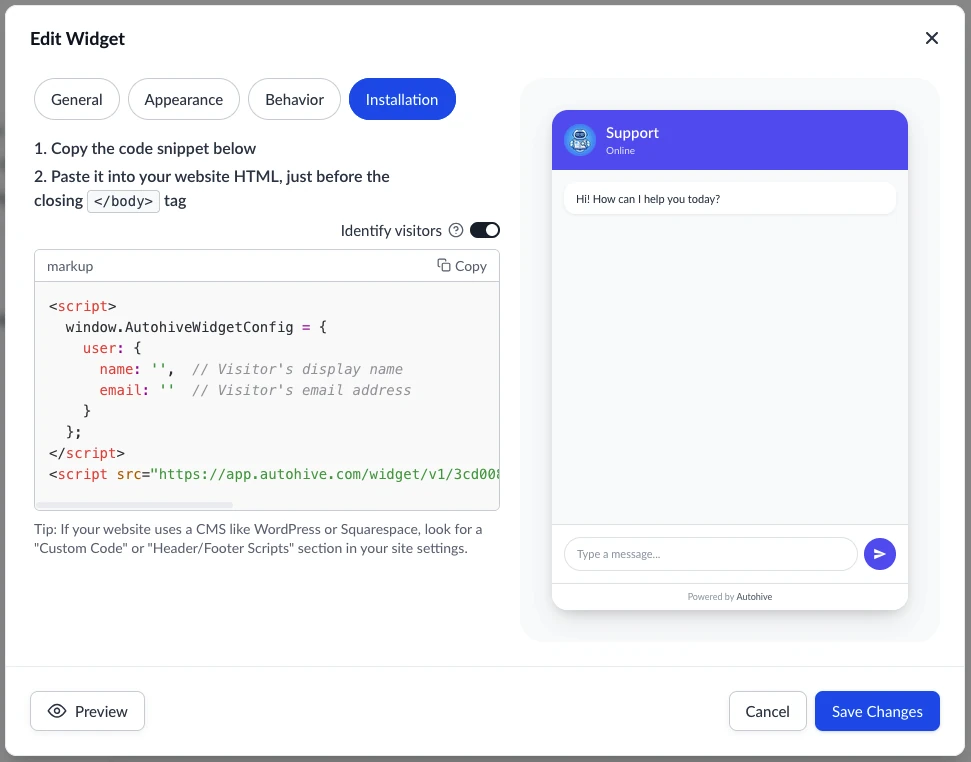
Identify visitors
Use Identify visitors in the Installation section when your website can provide the visitor’s name or email address.
When enabled, Autohive includes an extra configuration block before the script:
  <script>
  window.AutohiveWidgetConfig = {
    user: {
      name: '',  // Visitor's display name
      email: ''  // Visitor's email address
    }
  };
</script>
<script src="https://app.autohive.com/widget/v1/{public-widget-id}/embed.js" async></script>
Replace the empty values with data from your website, app, or CMS. Leave the setting off if your site does not know who the visitor is.
Test the widget
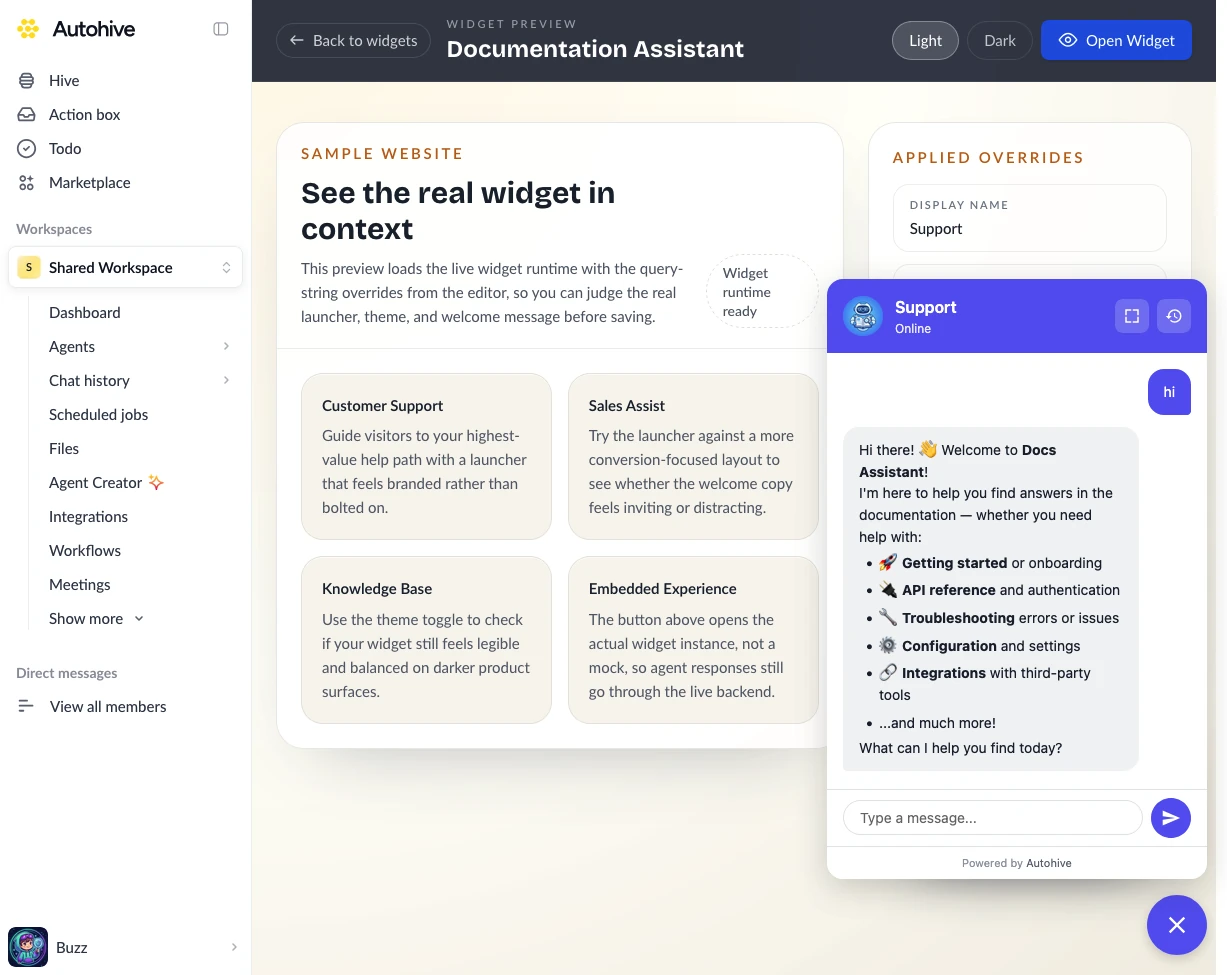
Test the widget before sending real visitors to it.
- Use Preview from the widget form or the widget row options menu.
- Open the real website page where you installed the script.
- Click the widget launcher.
- Send a test message and confirm the agent responds.
- If screenshots or attachments are enabled, test an upload that matches your configured limits.
- Test the widget from each allowed domain or subdomain.
Changes to appearance and behavior are served from Autohive. You normally do not need to reinstall the script after editing the same widget. If a change does not appear immediately, wait about a minute and refresh the page.
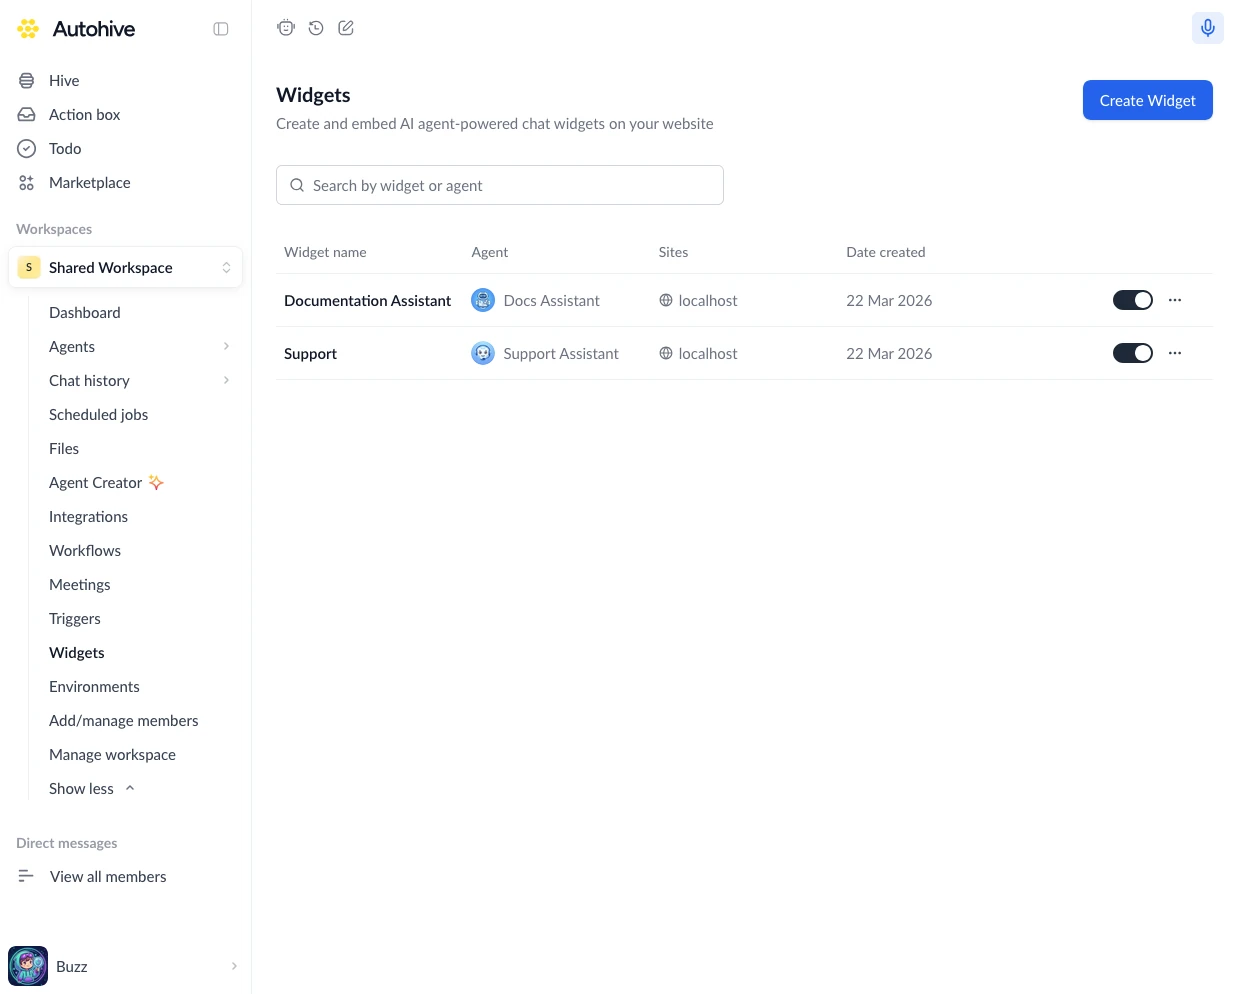
Manage widgets
The Widgets page lists every widget in the workspace. Use the search field to filter by widget name or agent.
Each widget row shows:
| Column | Description |
|---|---|
| Widget name | Internal widget name. |
| Agent | Agent connected to the widget. |
| Sites | Allowed domains for the widget. |
| Date created | Date the widget was created. |
| Actions | Active toggle and options menu. |
Widget actions
Use the three-dot menu on a widget to:
- Preview — open a live preview of the widget
- Copy embed code — copy the installation snippet again
- Edit — update the agent, allowed domains, appearance, behavior, or installation options
- Delete — remove the widget from the list
Use the active toggle to turn a widget on or off without deleting it. Disabled widgets stop loading on external sites, and active visitors see that the chat is no longer available.
Deleting a widget removes it from the list. Any installed script for that widget becomes inactive.
Visitor experience
Visitors see a launcher button on your website. When they open it, the widget starts or resumes their conversation with the selected agent.
The widget:
- Runs inside an isolated widget container so site styles do not interfere with chat styles
- Stores the visitor session in the browser so conversations can continue across page loads
- Uses the selected agent’s name, instructions, and capabilities available in the widget
- Supports screenshots and file attachments only when enabled for the widget
- Does not require visitors to sign in to Autohive
If a visitor clears browser storage, uses another browser, or switches devices, Autohive treats them as a new visitor.
Common issues
| Problem | Why it happens | How to fix |
|---|---|---|
| Widget does not appear on the website | The domain is not allowed, the widget is inactive, or the script was not added to the page | Check the active toggle, confirm the script is present, and add the exact domain or subdomain to Allowed Domains |
| Widget works in Preview but not on the website | Preview runs from Autohive, while your website must pass the allowed-domain check | Add the website domain, such as example.com or www.example.com, then refresh the site |
| Widget does not load on local development | localhost is not automatically allowed | Add localhost to Allowed Domains while testing locally |
| New colours or settings do not show immediately | The embed script may be cached briefly | Wait about a minute, then refresh the page |
| Visitors cannot upload a file | Attachments are off, the file type is not selected, or the file exceeds the size/count limit | Turn on Enable File Attachments and check the file settings |
| Screenshot capture is missing | Screenshot support is off | Turn on Enable Screenshots in Behavior |
| Widget creation fails | A required field is missing, the name already exists, or no valid agent is selected | Choose an agent, use a unique widget name, and correct any highlighted fields |
Best practices
- Give the widget a clear internal name, such as
Marketing Site SupportorHelp Centre Assistant. - Use one widget per website experience when domains, styling, or agent behavior should differ.
- Add both root and
wwwdomains when visitors may use both. - Keep the welcome message short and specific.
- Enable file uploads only when the agent needs files to answer well.
- Test the widget after changing the connected agent’s instructions or integrations.